


.png)

How to Measure Awkward Corner Spaces
Table of Contents
Why Accurate Measurement of Awkward Corners Matters
Best Tools for Measuring Corner Angles Angle Finder and Protractor Drafting Compass and Digital Tools
Angle Finder and Protractor
Drafting Compass and Digital Tools
Step-by-Step: Measuring Wall-to-Wall Perimeter Recording Your Measurements
Recording Your Measurements
How to Template Awkward Spaces with Scrap Wood Creating and Transferring Your Template
Creating and Transferring Your Template
Handling Non-90-Degree Angles and Outside Corners
Measuring for Built-In Cabinetry and Tight Spots Inside Corners and Flooring Considerations
Inside Corners and Flooring Considerations
Common Measurement Mistakes and How to Avoid Them
Conclusion
Last Updated: August 30, 2026
Why Accurate Measurement of Awkward Corners Matters
Getting measurements right when measuring awkward corner spaces separates custom furniture that fits perfectly from pieces that sit awkwardly in your home. A quarter-inch error in a corner measurement can mean the difference between a cabinet that slides in seamlessly and one that leaves visible gaps (awinet.org). When investing in custom, hand-crafted furniture from artisans like Richard Gentry Designs, accuracy at the measurement stage directly impacts the final result.
The challenge with awkward corners is that they're rarely perfect 90-degree angles (aia.org). Walls shift over time, floors settle, and architectural quirks create spaces that standard tape measures can't fully capture. Whether you're planning to measure awkward corner spaces for a built-in bookshelf, a custom desk that fits a sloped wall, or dining furniture for an angled alcove, understanding the right approach saves time, money, and frustration.

Best Tools for Measuring Corner Angles
The right tools transform corner measurement from guesswork into precision work. You need instruments that capture angles, not just linear distances.
Angle Finder and Protractor
An angle finder is the single most useful tool for capturing non-90-degree corners. This handheld device measures the exact angle between two surfaces, giving you a number you can transfer to your custom furniture plans. Digital angle finders display the angle on an LED screen, eliminating guesswork.
When using an angle finder, position it so both arms sit flush against the wall surfaces meeting at the corner. Press firmly and read the angle. Record this number, it's critical information for your craftsperson. If you're working with Richard Gentry Designs on custom cabinetry or fitted furniture, this angle measurement is often the difference between a piece that requires on-site adjustments and one that fits perfectly the first time.
Drafting Compass and Digital Tools
A drafting compass creates a physical template of the corner's shape by adjusting the compass legs to match the corner's contours, then transferring that shape to your material or sketch. Digital tools like smartphone apps and laser measurement devices offer another approach, though laser tools work best for straight-line measurements rather than complex corner geometry.
The best approach combines tools: use an angle finder for the primary angle measurement, then use a drafting compass or template method to capture any irregularities in how the walls actually meet.

Step-by-Step: Measuring Wall-to-Wall Perimeter
Measuring the full perimeter of an awkward space requires a systematic approach that documents how the space actually exists, including all its quirks.
Step 1: Start with a baseline measurement. Choose one wall as your reference point and measure from corner to corner, recording the distance in inches. Do this twice to confirm accuracy.
Step 2: Measure each wall segment individually. Don't assume walls are straight. Measure from corner to corner along each wall, documenting any variations.
Step 3: Check for plumb and level. Use a level to verify whether walls are truly vertical and floors truly horizontal. Place a level against the wall at multiple points, top, middle, and bottom, and record any deviation.
Step 4: Measure the diagonal. For rectangular spaces, measure corner-to-corner diagonally in both directions. If these measurements are equal, the space is truly rectangular. If they differ, the space is a parallelogram.
Step 5: Document ceiling height. Measure from floor to ceiling at multiple points, near each wall and in the center. Record the highest and lowest points.
Recording Your Measurements
Create a simple sketch of the space with all measurements labeled. Include wall lengths, angles at each corner, ceiling heights, and any obstacles like baseboards or electrical outlets. Take photos of the space from multiple angles. When working with a custom furniture maker like Richard Gentry Designs, these visual references help the craftsperson understand the spatial context. Store your measurements in a document you can easily share with your designer.
How to Template Awkward Spaces with Scrap Wood
When a corner is too irregular for standard measurement, creating a physical template from scrap wood captures the exact shape. A template is a full-scale model of the corner space cut from thin plywood or cardboard that becomes your reference for how the custom piece should fit.
Creating and Transferring Your Template
Step 1: Gather materials. Use ¼-inch plywood, cardboard, or thin hardboard, material that's rigid enough to hold shape but thin enough to slide into tight spaces.
Step 2: Cut your material into strips about 2-3 inches wide that you'll assemble to match the outline of your corner space.
Step 3: Fit the strips to the corner. Position the first strip against the wall and use a compass or flexible ruler to trace the wall's contour onto the strip. Mark where the strip meets the perpendicular wall.
Step 4: Cut along your traced line. Use a jigsaw or handsaw to cut the strip along the line you traced. Repeat this process for each wall segment.
Step 5: Assemble your template. Connect the individual strips to create a complete template representing the full corner space using small nails or screws.
Step 6: Test-fit your template. Place the assembled template in the actual corner space. It should fit snugly without forcing. Adjust if gaps appear.
Step 7: Transfer to your craftsperson. Bring the template to your consultation with Richard Gentry Designs or photograph it thoroughly and include those images with your measurements.
Handling Non-90-Degree Angles and Outside Corners
Outside corners present a different challenge than inside corners. An inside corner is where two walls meet inward; an outside corner is where walls meet outward, creating a protruding edge. Both require accurate angle measurement, but the approach differs slightly.
For outside corners, measure the angle using your angle finder just as you would for an inside corner, but be aware that the angle reading tells you the interior angle. Non-90-degree angles are common in homes with additions, angled walls, or architectural features like vaulted ceilings. Measure each angle independently and don't assume consistency throughout the space.
Measuring for Built-In Cabinetry and Tight Spots
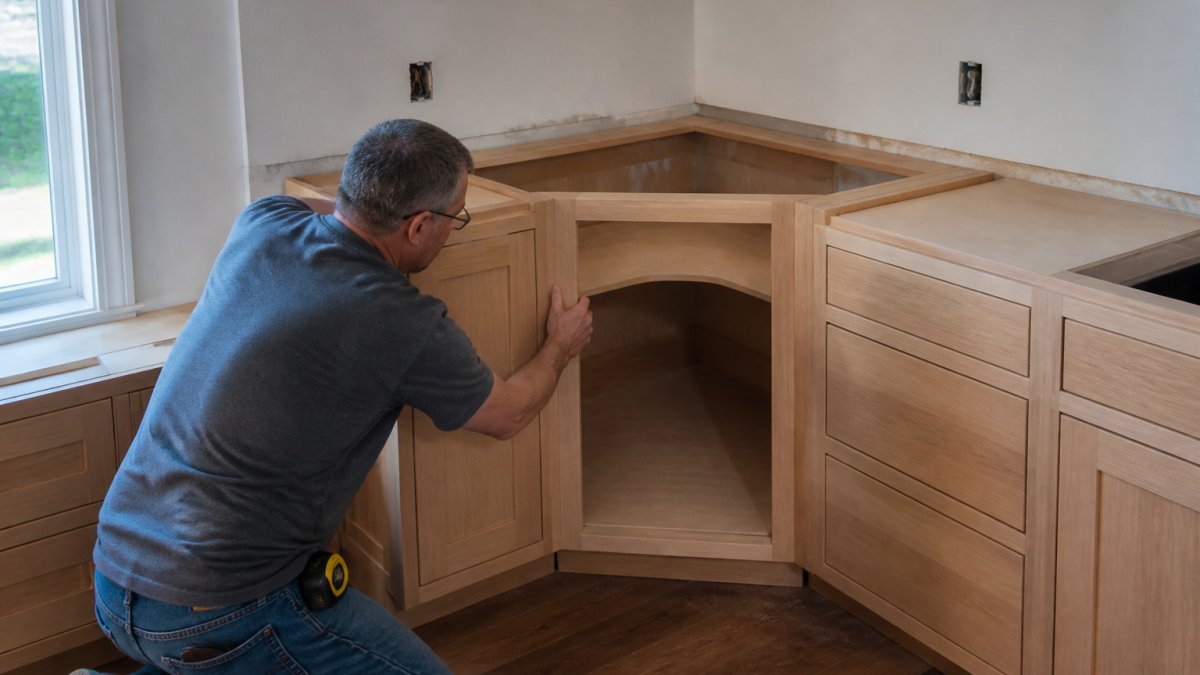
Built-in cabinetry requires more precision than freestanding furniture because the piece becomes part of the wall. Measure not just the overall dimensions but also the specific locations of obstacles like electrical outlets and baseboards. Determine whether cabinet doors will swing freely or hit the corner wall.
Measure the floor level at multiple points. Floors often slope slightly, especially in older homes (nachi.org). If you're building a floor-to-ceiling cabinet in a space where the floor slopes, the cabinet must be designed to accommodate this slope.
Inside Corners and Flooring Considerations
For inside corners, measure the angle, the depth of the corner recess, and the height from floor to ceiling. For flooring projects, measure the angles and create templates for corner cuts to reduce waste and ensure tight joints. Document where the floor meets the wall in each corner and whether the baseboard sits flush.
Common Measurement Mistakes and How to Avoid Them
Mistake 1: Measuring only once. Always measure twice and compare. If measurements differ by more than ¼ inch, measure a third time.
Mistake 2: Assuming corners are square. Always use an angle finder to verify. Don't trust your eye.
Mistake 3: Ignoring wall irregularities. Measure at multiple points along each wall. Walls might bow slightly near corners.
Mistake 4: Forgetting to measure obstacles. Document the exact locations of electrical outlets, heating vents, and structural elements. Measure from a fixed reference point to each obstacle.
Mistake 5: Not accounting for door swings. Measure how far doors swing and whether they will hit your custom furniture.
Mistake 6: Measuring in different units. Stick with inches throughout. Convert everything to inches for consistency.
Mistake 7: Poor documentation. Create a clear, organized record of your measurements with a sketch or photo showing where each measurement was taken.
Getting the measurements right when you need to measure awkward corner spaces is the foundation of successful custom furniture. At Richard Gentry Designs, we'll transform those awkward corners into functional, beautiful areas of your home. When you're ready to design furniture that fits your specific space perfectly, bring your measurements and templates to a consultation. With over 25 years of experience creating hand-crafted pieces tailored to unique spaces, we'll transform those awkward corners into functional, beautiful areas of your home.
Frequently Asked Questions
Q: What's the fastest way to measure awkward corner spaces if I'm working with a tight timeline?
A: Use an angle finder to capture non-90-degree angles in seconds, then photograph your measurements alongside a tape measure for reference. This digital approach beats manual protractor work. For custom furniture projects, sharing photos and precise angles with your craftsperson speeds up the design phase significantly. If you're working with a furniture maker like Richard Gentry Designs, clear angle measurements and wall-to-wall perimeter data allow them to start your custom piece sooner.
Q: How do I know if my measurements are accurate enough for custom furniture?
A: Measure each dimension three times and verify they match. For angles, use an angle finder and double-check with a protractor. Create a scrap wood template for irregular shapes and test it against the space before finalizing dimensions. When ordering custom furniture, errors of more than half an inch can affect fit. If you're unsure, provide photos, measurements, and your template to your craftsperson, they can often spot issues and ask clarifying questions before building.
Q: Can I use digital tools instead of traditional measuring instruments?
A: Digital angle finders and smartphone measurement apps work well for capturing angles and rough dimensions, but they're most reliable when paired with a physical tape measure for wall-to-wall distances. Apps estimate distance using camera perspective, which introduces error over longer spans. For custom furniture projects, combine digital angle captures with traditional tape measurements for the most accurate baseline your craftsperson needs.
Q: What should I do if my corner isn't square and nothing off-the-shelf fits?
A: Non-square corners are exactly why custom furniture exists. Measure the angle at the corner, the wall-to-wall distance at multiple points along the space, and note any bowing or irregularities in the walls. A scrap wood template helps clarify the exact shape. Custom makers like Richard Gentry Designs specialize in pieces built to your specific spatial constraints, your detailed measurements and template become the blueprint for a piece that fits perfectly where standard furniture cannot.
SHOP
This article was written using GrandRanker
Comments